1. Purpose of the User Guide
The purpose of this User Guide is to give instructions on how to operate the MCP Management Portal (Previously the Maritime Cloud Management Portal). The reader is expected to be familiar with the concepts of MCP. For more information about MCP, please visit the official homepage: https://maritimeconnectivity.net
2. General focus of the MCP Management Portal
Everything in the MCP Management Portal is centered around the organization of the logged in user.
Every entity in the Identity Registry section, only has data for the users own organization.
An organization’s own entities: Vessels, Devices, Users, and Certificates are considered private and will never be shown to others. However, the Service Registry section has the possibility to show data for services of all organizations. Services for other organizations are always in read-only mode though and will never show Certificates - regardless of the user’s administrative rights.
2.1. Icons and colors in the MCP Management Portal
Icons and colors in the MCP Management Portal follow the standard in the table:
| Icon and color | Function |
|---|---|
|
Input field with validation not OK |
|
Input field with validation OK |
|
White button: Cancel or OK will always close the view and go back |
|
Blue button: "Safe" button - no changes of the data in the Service- or Identity registry. A new page will be shown with the given functionality |
|
Red button: "Unsafe" button - changes will be submitted to the data in the Service- or Identity registry |
3. Not yet implemented
The Management Portal is still in early beta; thus many features are not yet implemented. If a section in this guide is "not yet implemented", but is needed or wanted, (e.g. deletion of services) please file an issue at the Github project.
4. MRN - Maritime Resource Name
Every entity in the Maritime Connectivity Platform requires an MRN. For entities in the Identity Registry (e.g. Vessels) the MRN is autogenerated following the mask:
urn:mrn:<mcl|stm>:<entity-type>:<org-shortname>:<entityID>
Example for a vessel from DMA:
urn:mrn:mcl:vessel:dma:imo12345
For entities in the Service Registry the MRN is not autogenerated, because it’s part of the XML that is uploaded when creating or updating Services on all levels (Specification, Technical Design, Instance). The MRN will be validated though. It needs to follow the mask:
urn:mrn:<mcl|stm>:service:<service-level>:<org-shortname>:<serviceID>
Example for a service specification, technical design, instance from DMA respectively:
urn:mrn:mcl:service:specification:dma:nw-nm
urn:mrn:mcl:service:design:dma:nw-nm-rest
urn:mrn:mcl:service:instance:dma:nw-nm-rest-1
5. Login
The MCP Management Portal for the production environment can be reached at https://management.maritimecloud.net
5.1. Join MCP and get access to the MCP Management Portal
To get access to the MCP Management Portal your organization must be enrolled in MCP by a person who holds the legal rights to act on behalf of the organization. Please follow the "Join" link on the MCP Management Portal login page to fill out the application form. The organization will be validated and approved by a MCP governance organization, after which the applying organization will get access to the MCP Management Portal.
In the test period in the EfficienSea2 and STM Validation project, the governing organization will be the Danish Maritime Authority.
5.2. Login when my organization is federated into MCP
When your organization is federated into MCP, you can use your normal organization login (probably your Windows login).
Choose your organization in the list and you will be redirected to your organization’s federated login page.
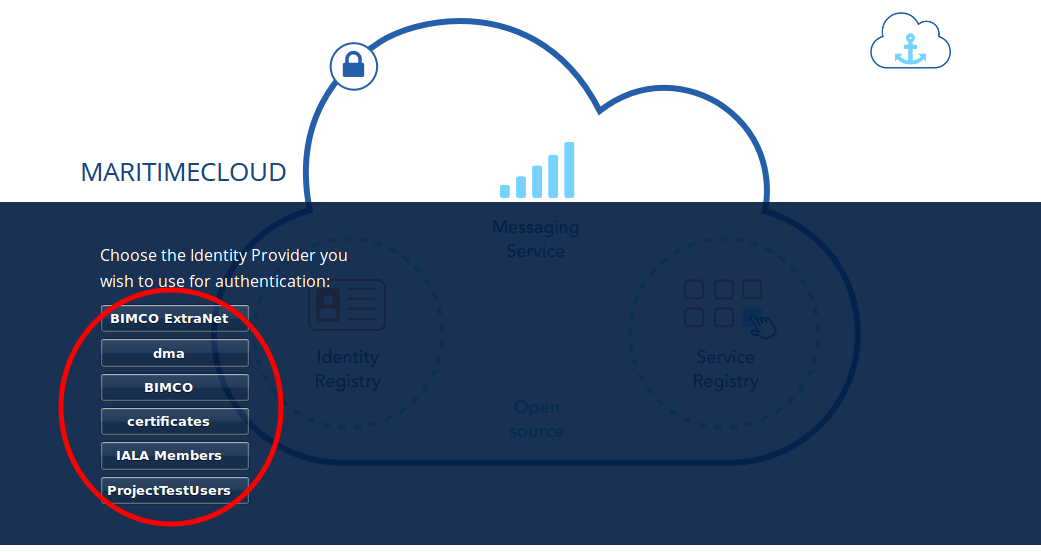
Once you have logged in with your organization login you will be redirected back to the MCP Management Portal with access.
5.3. Login when my organization is part of the Project test phase (ProjectTestUsers)
When your organization is not federated, you will get access through the EfficienSea2 and STM Validation project test users.
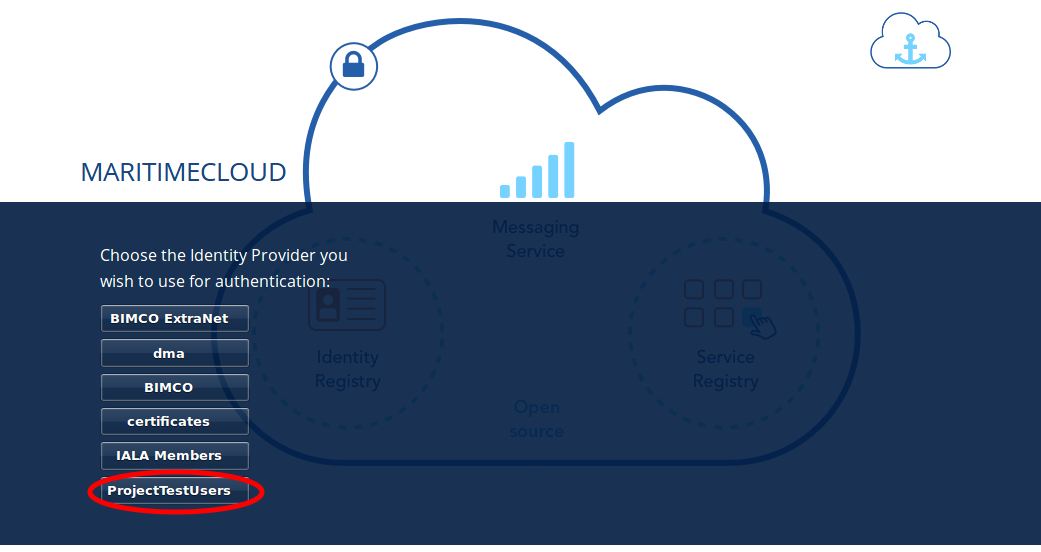
Choose the "ProjectTestUsers" and provide your login information in the next page.
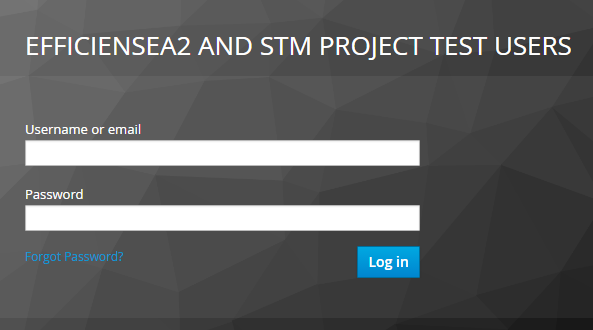
You will be redirected to the MCP Management Portal with access.
5.4. Login to the Test environment
When using the test environment (the MCP Management Portal for the test environment can be reached at https://test-management.maritimecloud.net) you can login using the same user as when you log into the production environment. To do this choose the "MC-production" Identity Provider when logging in.
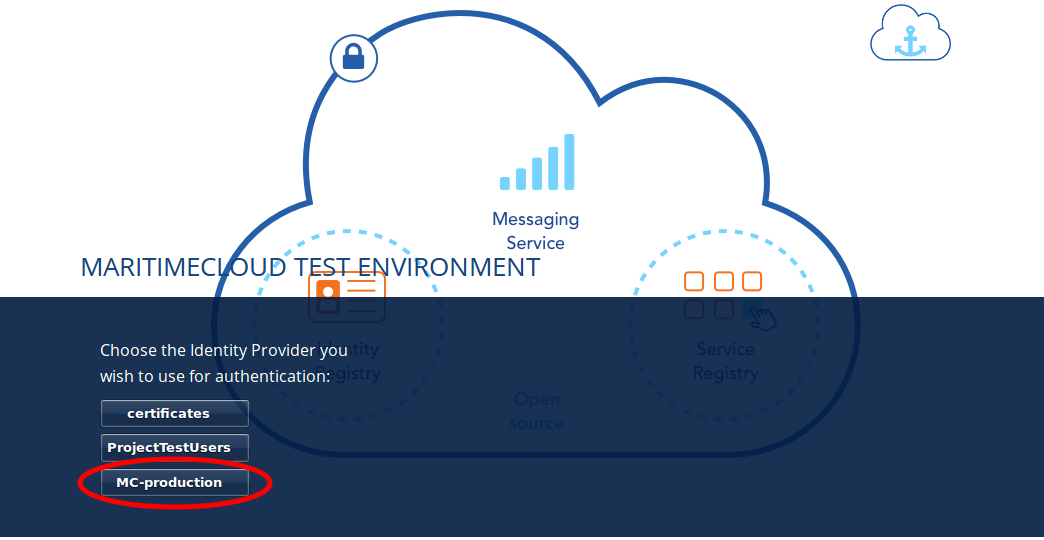
This will redirect you to the login of the production environment, and you can then login as described in [login-when-my-organization-is-federated-into-the-maritime-cloud] or Login when my organization is part of the Project test phase (ProjectTestUsers).
5.5. Access Roles
The MCP Management Portal currently has 2 different roles. Administrator with full editorial rights (for own organization only) and Member with read-only rights.
The intention is to implement a finer grained access roles - for example, admin roles for only the Identity Registry and only the Service Registry etc.
6. Managing the Identity Registry
The entities in your organizations Identity Registry can be found in the menu.
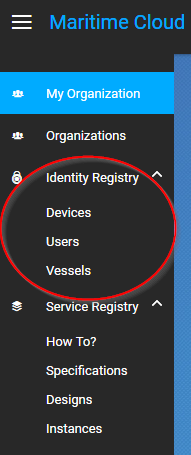
The following subsections will explain how each entity is managed.
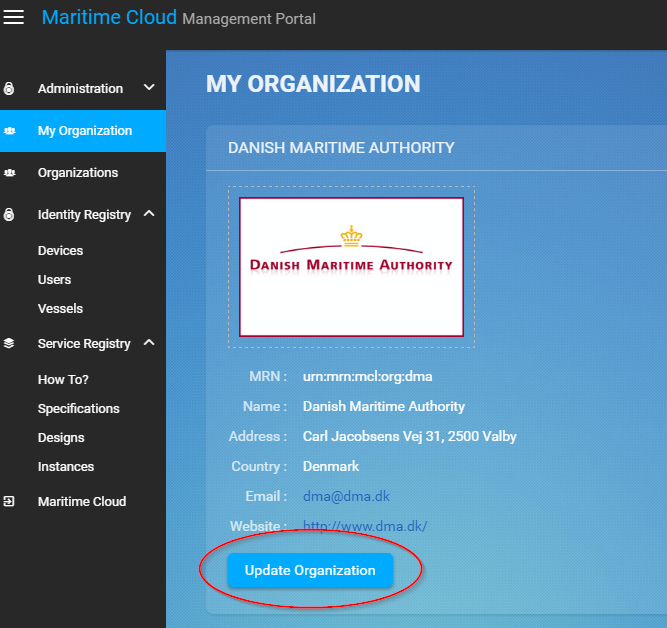
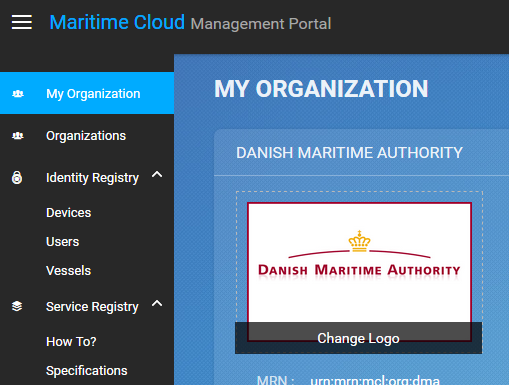
6.1. My Organization
This is the "home" of the MCP Management Portal. Here you can find various information about your own organization, like contact info, certificates (for organization level), Access Roles, etc.
6.1.1. Update contact information
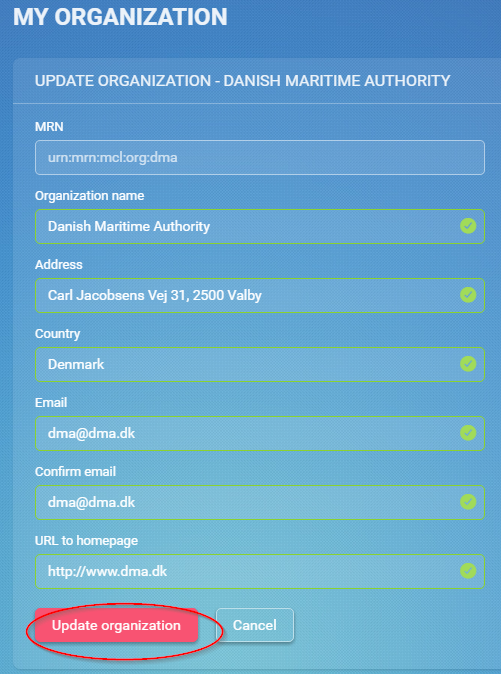
To update the contact information of your organization, click the "Update" button on the "My Organization" page.
Make the changes and click "Update organization".
6.1.2. Change logo
You can change the logo of your organization. The logo is only used in the list of organizations, which every user of the MCP Management Portal can see. Should no logo be uploaded, a default logo will be displayed.
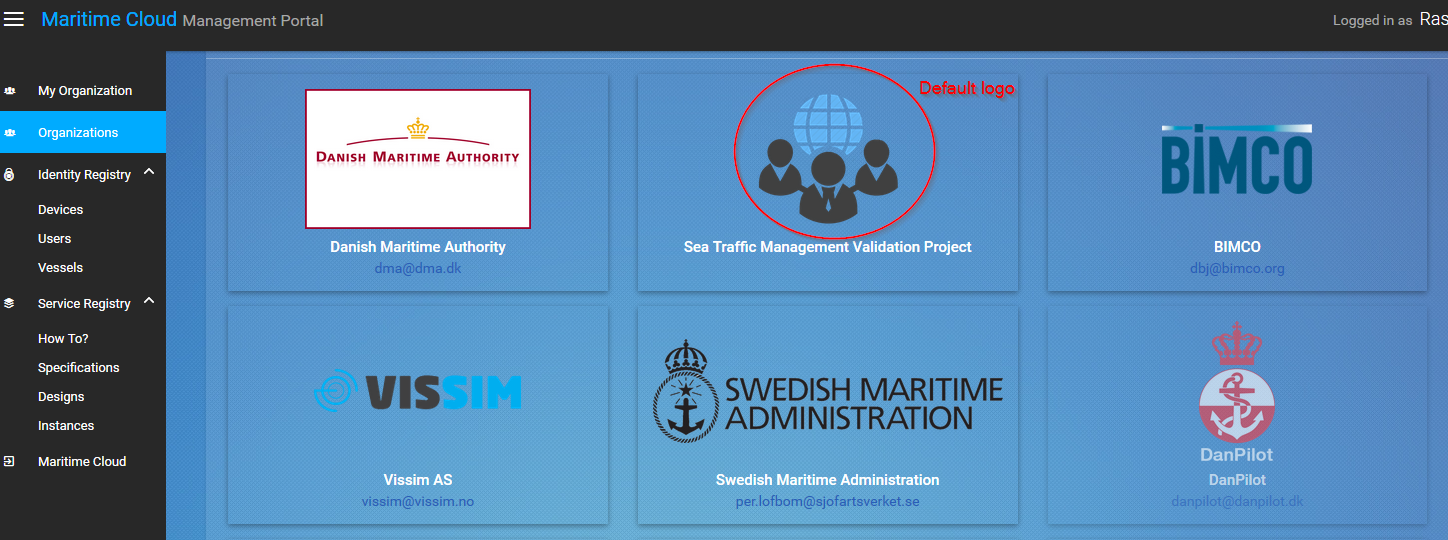
To upload a new logo, click on the logo on the "My Organization" page and browse to the new logo.
6.1.3. Access Roles
Not yet implemented.
6.1.4. Identity Provider information
Not yet implemented.
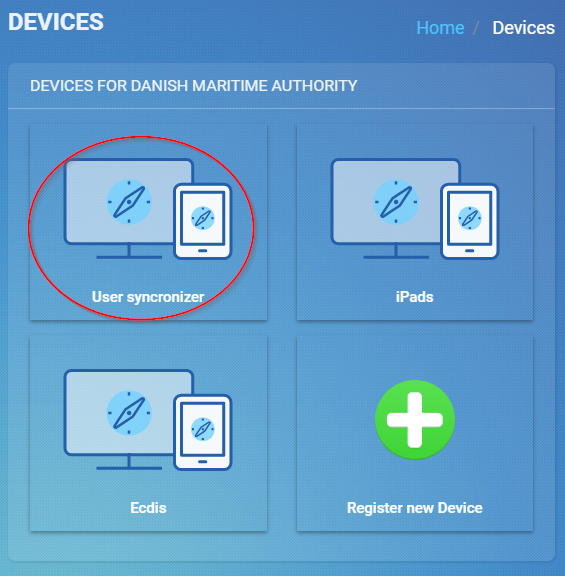
6.2. Vessels & Devices
The management of Vessels and Devices is handled in the same way. Therefore, the examples in this section apply for both.
Note: the only reason for creating Vessels and Devices is if you need a certificate for the Vessel or Device concerned. Read more about management of certificates in the section Certificates.
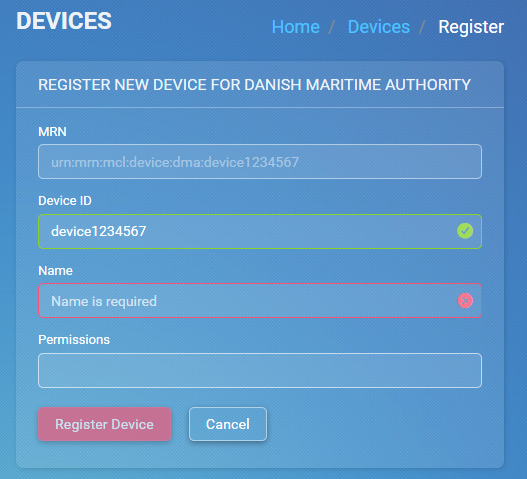
6.2.1. Create
To create a Vessel or Device, click the "+" in the list.
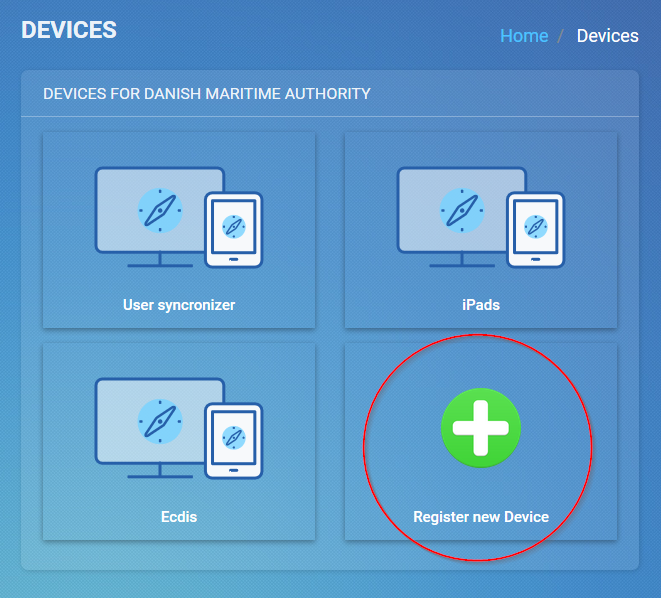
Fill out the form and click "Register Device/Vessel". The "Permissions" field is explained in depth in the Permissions section of this guide.
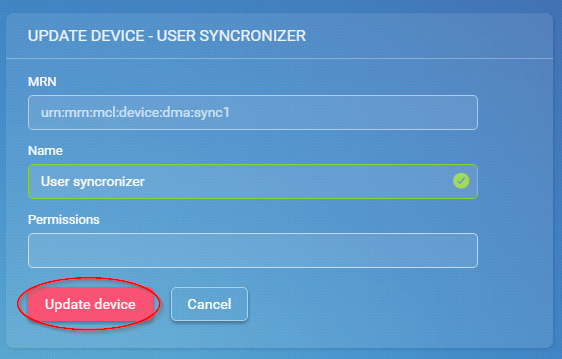
6.2.2. Update
To create a Vessel or Device, choose it in the list and click the "Update" button on the details page.
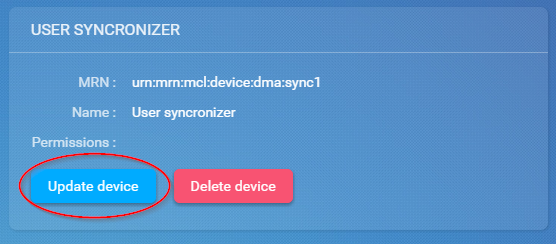
Make the changes and click "Update device".
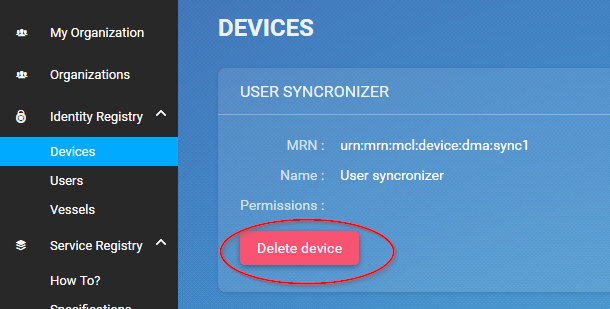
6.2.3. Delete
Warning: If you delete an entity, all issued certificates will be revoked and become invalid.
To delete click the "Delete" button on the entity you want to delete.
6.3. Users
"Users" in this context refers to human users. Users can authenticate using the Openid Connect Identity Provider, or use a certificate issued by MCP.
6.3.1. Create
If an organization is federated into MCP, you do not need to create users!
The users will automatically be created the first time they log in on a webpage that uses MCP, such as the MCP Management Portal.
If an organization is not federated into MCP and is using the "ProjectTestUsers" Identity Provider, users must be created manually in the Management Portal. When the user has been created, he/she will receive an email with instructions for how to log in with a temporary password.
6.3.2. Update
When an organization is federated into MCP, users are automatically created and updated when they log in on a webpage that uses MCP, such as the MC Management Portal.
In the case that an organization is not federated into MCP, but is using the "ProjectTestUsers" Identity Provider, users must be updated manually in the Management Portal.
Updating the password of a user cannot be done in the portal, this must be done from the "ProjectTestUsers" Identity Provider.
6.3.3. Delete
For organizations, which is federated into MCP, users are automatically created or updated when they log in on a webpage that uses MCP, such as the MCP Management Portal. Therefore, deleting users does not make much sense for federated organizations, unless it is necessary to clean up the user list, or to remove all the users’ certificates.
If an organization is not federated into MCP and is using the "ProjectTestUsers" Identity Provider, users can be deleted from the portal. This will also remove the user from the "ProjectTestUsers" Identity Provider. The user will no longer be able to log in to access MCP services.
When a user is deleted all of the user’s certificates are revoked.
6.4. Permissions
"Permissions" is a field which service providers can use to implement a method of access control (authorization) in their services. As an example, an organization could wish to grant extended access to a service for all their pilots from a single point of control. The permissions field is a way to facilitate this.
For a more thorough explanation and example, please refer to the online documentation for authorization in MCP.
6.5. Certificates
Certificates can be issued on all entities in MCP (e.g. Devices, Vessels, Users, Organizations, Services). For a better understanding of how certificates is used in MCP and which parameters is included, please refer to the online documentation.
6.5.1. Information in the certificate
In the certificate, there are several information’s about the entity. Please refer to the online documentation.
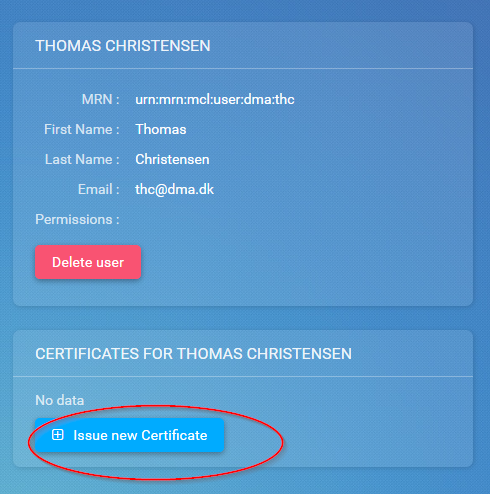
6.5.2. Issuing a certificate
On every entity details page, there is a certificate section. This section is the same component for all entities. Therefore, the description and examples applies for all.
To issue a new certificate, click on the "Issue new Certificate" button.
Click on "Issue Certificate".
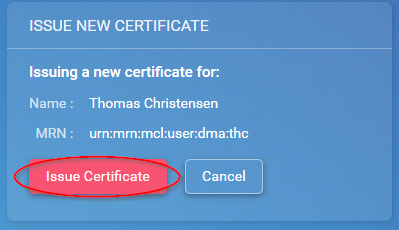
And that is it. A certificate has been issued and is ready for download.
When you download you will receive a zip file that contains public key, private key and certificate in PEM format, and the certificate in .p12 and .jks keystores. The password for the keystores are written in a .txt file that is also contained in the zip file.
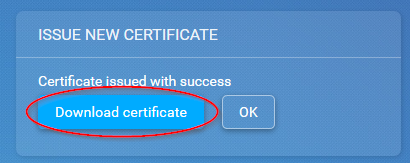
NOTE: It is very important that you download the certificate, because it is the only time, that you can download the public- and private key.
6.5.3. Revoking a certificate
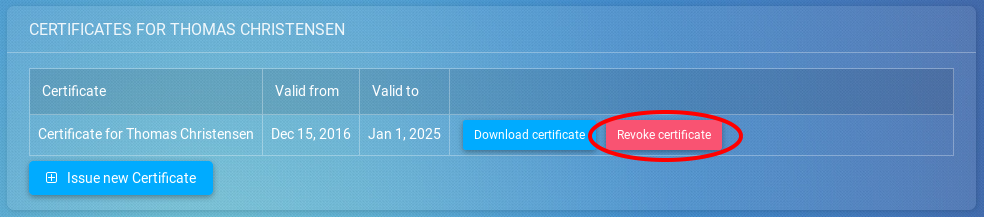
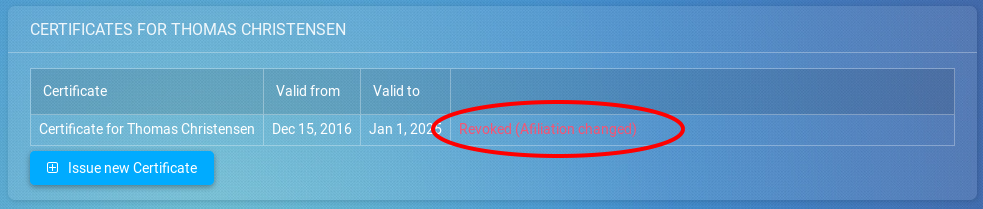
When a certificate needs to be revoked, find the relevant user/vessel/device/service and the certificate that should be revoked at click on "Revoke".
This will show a window where you will have to choose a reason and a date for the revocation in the selectors. Once these has been entered you can click "Revoke".
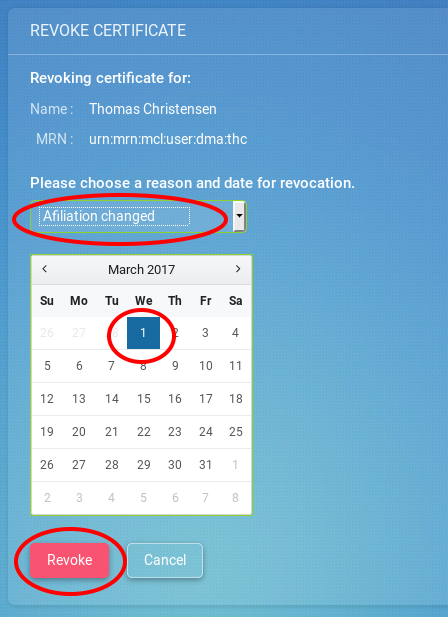
The certificate will now have been revoked and the certificate will be marked as such in the certificate list.
7. Managing the Service Registry
The Service Registry consists of 3 levels:
-
Specification: Technology-agnostic logical level (What)
-
Technical Design: Technology level (How)
-
Instance: The actual service implementation (Where)
For more information of the 3 levels and how they are connected, please refer to the online documentation at http://maritimeconnectivity.net or the "How To?" page in the MCP Management Portal.

The following subsections will describe each level in the service registry and how to manage.
Note: At the moment, service data is shown for all organizations with no possibility to filter or search. In the future, there will be filtering and searching options. Service data for other organizations is always in read-only mode though and will never show Certificates - regardless of the user’s administrative rights.
7.1. Services Specification
7.1.1. View and download
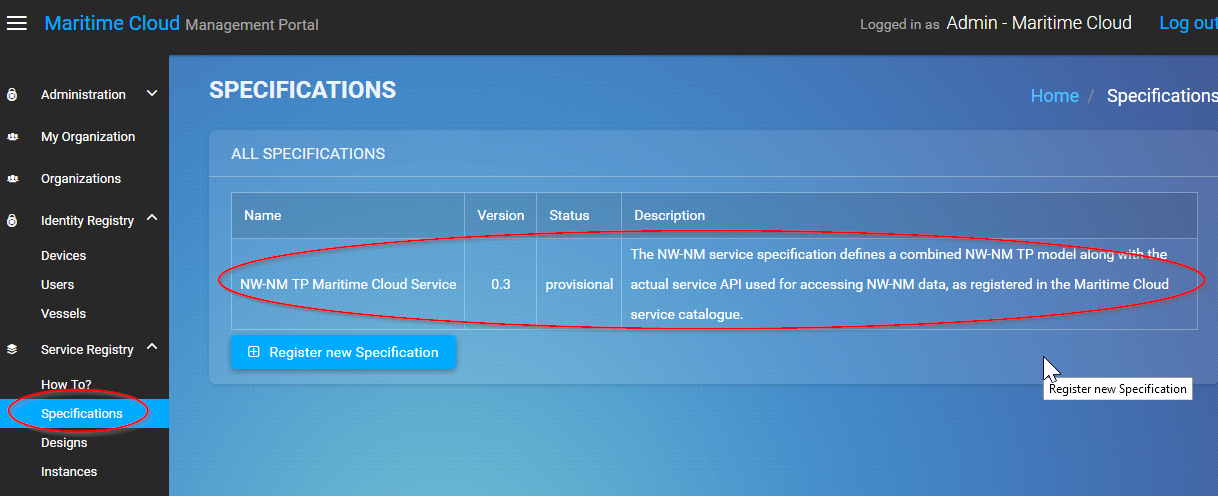
To view a Specification, click "Specifications" in the menu and a list of specifications appear. Click on any column of a row in the list to view that Specification.
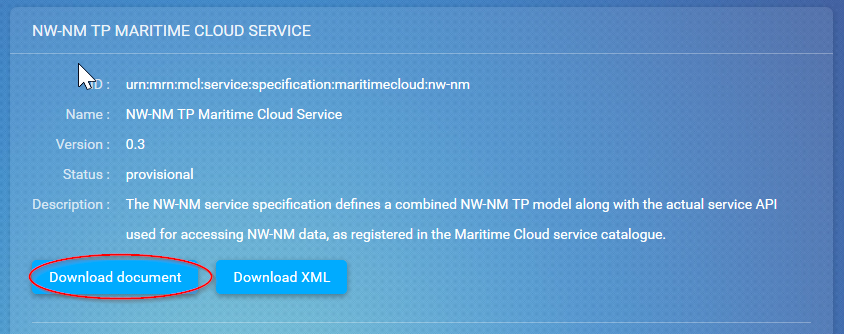
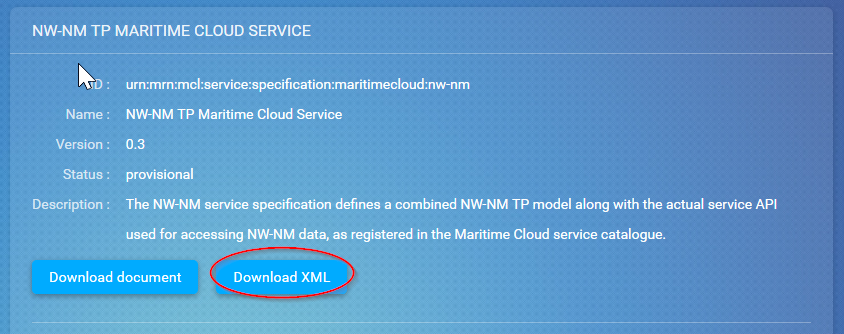
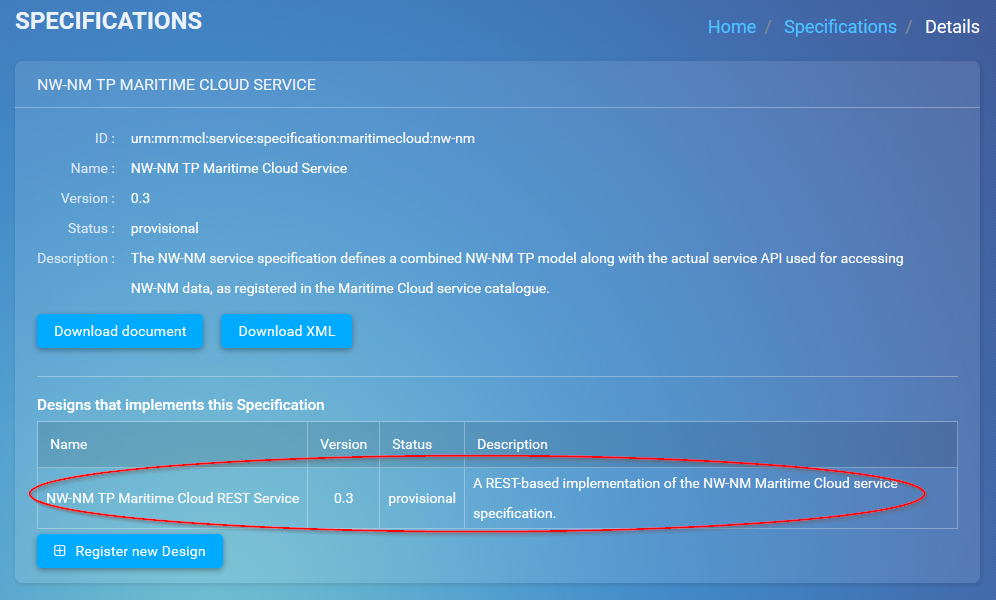
In the details page, you can see a subset of the Specification data. To view all data, you can download the actual documents that were uploaded upon the registration of the Specification.
7.1.2. Create/Register
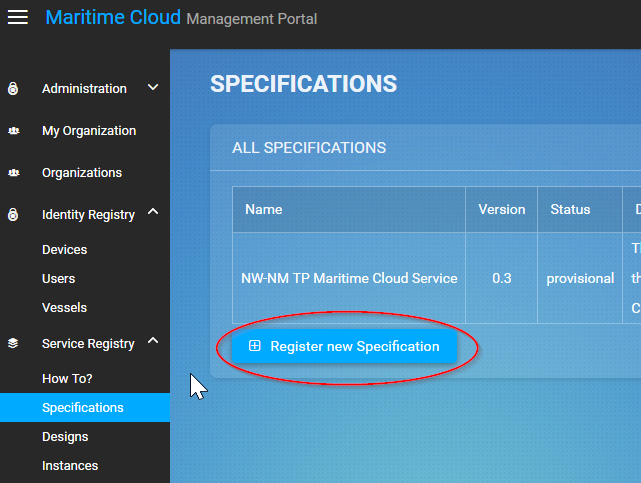
To register a new Specification, click "Specifications" in the menu and a list of specifications appear. Click the "Register new Specification" button at the bottom of the list.
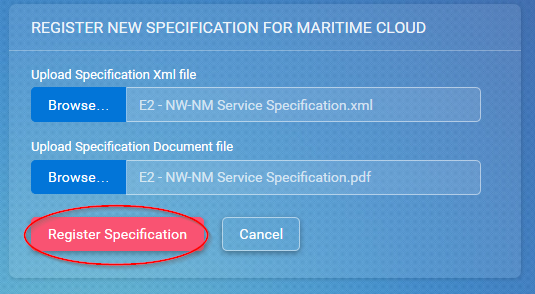
Now you can upload 2 documents (see online documentation for templates of the documents):
-
An XML-file following the official template with machine readable information. This is a required document
-
A document in human readable format of the Specification. This is not required, but it is highly recommended to provide
When the XML-file is uploaded, there will be a validation of the Specification ID, which should be a MRN (refer to the MRN - Maritime Resource Name section of this guide. An example MRN for DMA would be: urn:mrn:mcl:service:specification:dma:nw-nm
When all is uploaded correctly, click the "Register Specification" button.
7.1.3. Update
Not yet implemented.
7.1.4. Delete
Not yet implemented.
7.2. Service Technical Design
7.2.1. View and download
To view a Technical Design, click "Designs" in the menu and a list of Technical Designs appear. Click on any column of a row in the list to view that Design.

You can also get to the design by clicking any column of a row if you have a Specification in view.
In the details page, you can see a subset of the Technical Design data. To view all data, you can download the actual documents that were uploaded upon the registration of the Technical Design.

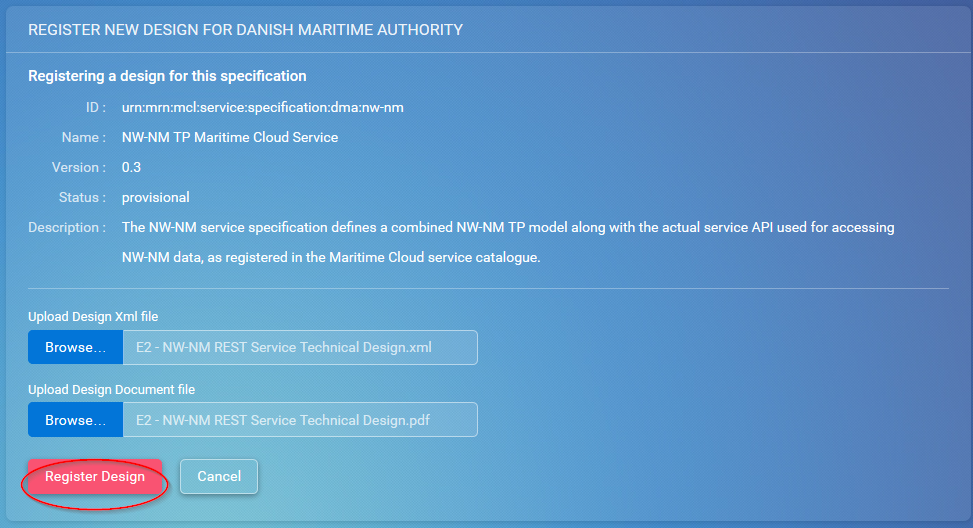
7.2.2. Create/Register
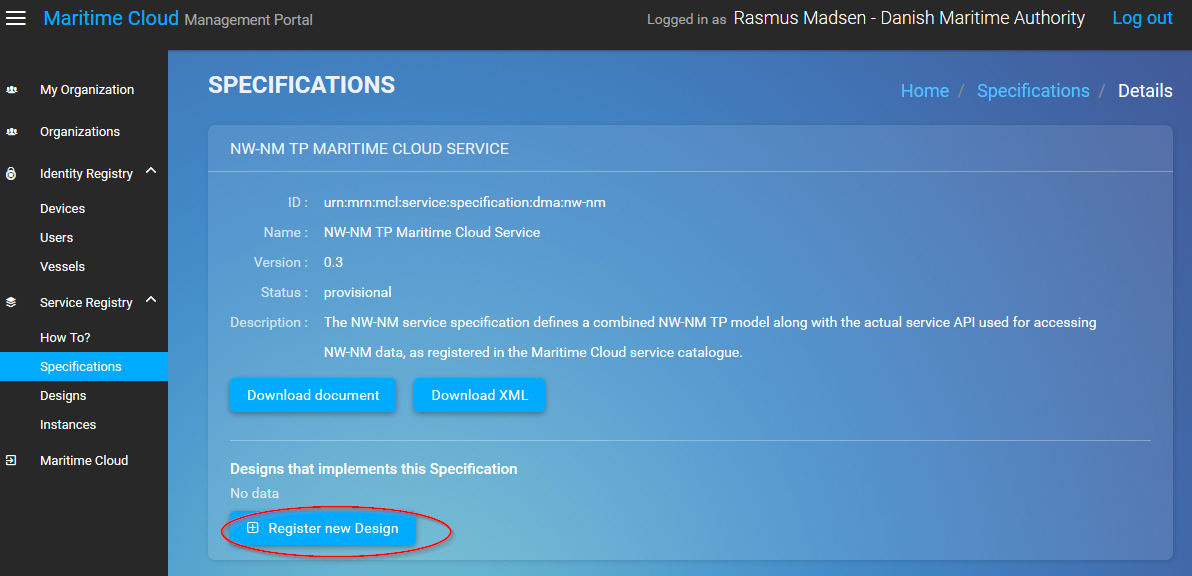
To register a new Technical Design, you need to select the Specification you want the Technical Design to implement. When the Specification is selected, you should click on the "Register new Design" at the Specification details page.
Now you can upload 2 documents (see online documentation for templates of the documents):
-
An Xml-file following the official template with machine readable information. This is a required document
-
A document in human readable format of the Technical Design. This is not required, but it is highly recommended to provide
When the XML-file is uploaded, there will be a validation of the Technical Design ID, which should be a MRN (refer to the MRN - Maritime Resource Name section of this guide. An example MRN for DMA would be: urn:mrn:mcl:service:design:dma:nw-nm
When all is uploaded correctly, click the "Register Design" button.
7.2.3. Update
Not yet implemented.
7.2.4. Delete
Not yet implemented.
7.3. Service Instance
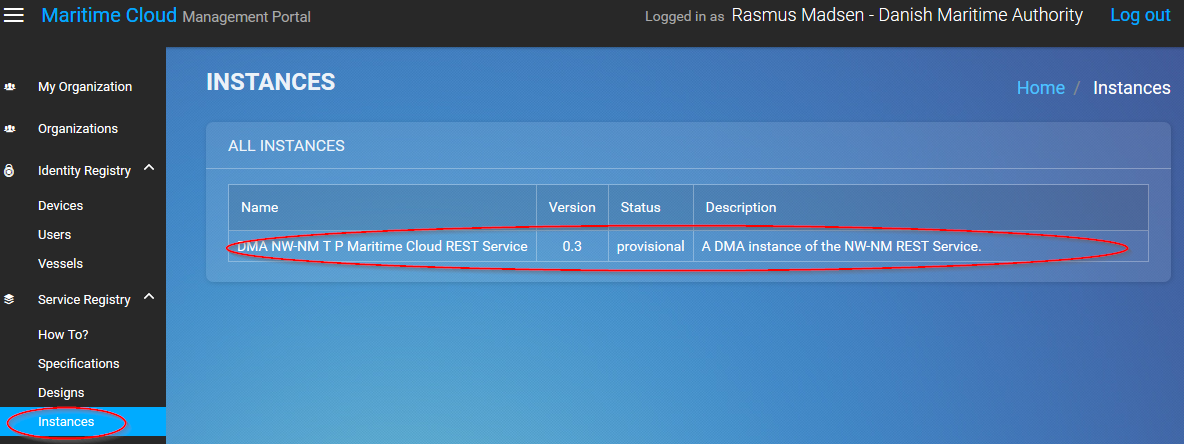
7.3.1. View and download
To view an Instance, click "Instances" in the menu and a list of Instances appear. Click on any column of a row in the list to view that Instance.
You can also get to the Instance by clicking any column of a row if you have a Technical Design in view.

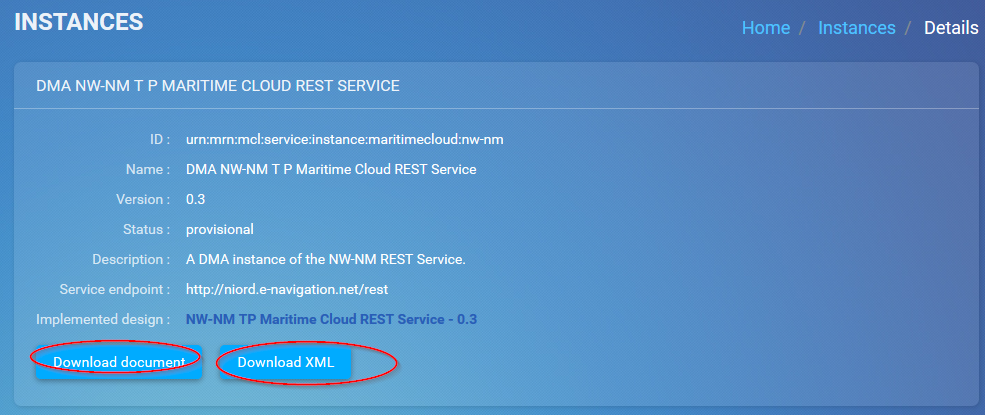
In the details page, you can see a subset of the Instance data. To view all data, you can download the actual documents that were uploaded upon the registration of the Instance.
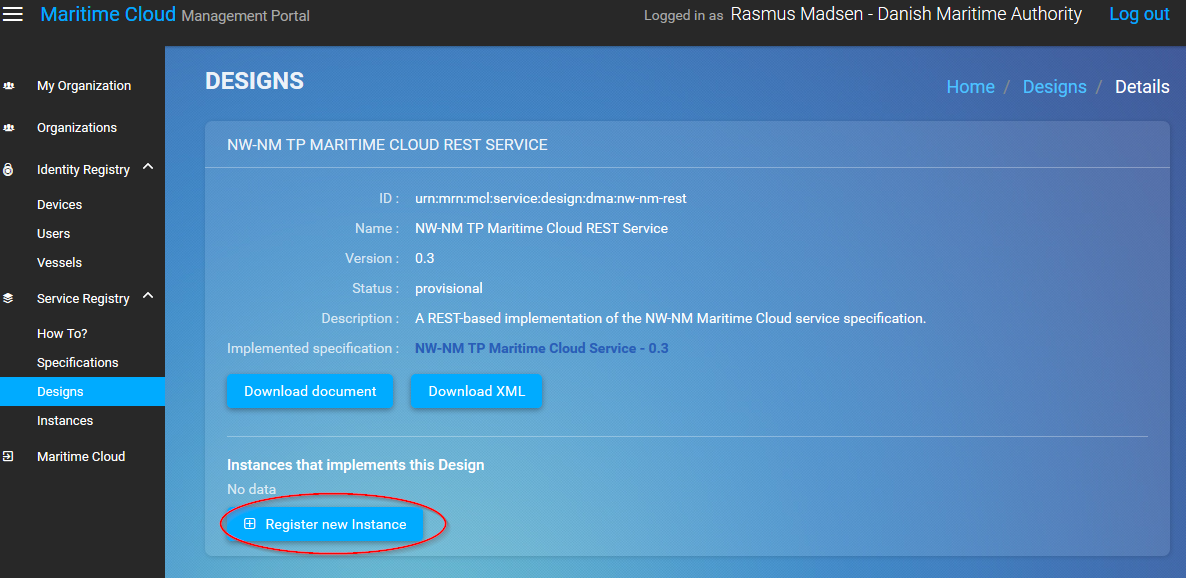
7.3.2. Create/Register
To register a new Instance, you need to select the Technical Design you want the Instance to implement. When the Technical Design is selected, you should click on the "Register new Instance" at the Technical Design details page.
Now you can upload 2 documents (see online documentation for templates of the documents):
-
An XML-file following the official template with machine readable information. This is a required document
-
A document in human readable format of the Instance. This is not required, but it is highly recommended to provide
When the XML-file is uploaded, there will be a validation of the Instance ID, which should be a MRN (refer to the MRN - Maritime Resource Name section of this guide. An example MRN for DMA would be: urn:mrn:mcl:service:instance:dma:nw-nm
When all is uploaded correctly, you can provide additional information to the service if you should need to issue certificates for the service later. This includes the field "Certificate Domain Name", where you should enter the name of the domain where the service will be hosted (e.g. Service.dma.dk) and the field "Permissions" which will also be embedded in the certificate. Should this not be relevant for your service, simply leave the fields empty.
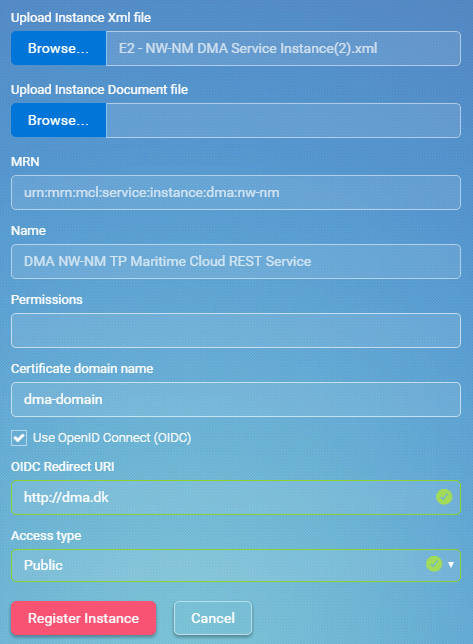
When everything is OK, click the "Register Instance" button.
7.3.3. Update
Not yet implemented
7.3.4. Delete
Not yet implemented.
7.4. Searching the Service Registry
Not yet implemented.